Last Updated: July 3, 2026
Top Aging Place Bathroom Remodel Checklist Picks for 2026
Here are our current top aging place bathroom remodel checklist picks, compared on real Amazon owner reviews, price, and features. Live prices update below.


An aging in place bathroom remodel is the single highest-impact home project for anyone planning to stay in their house through their later years. The bathroom is where slick surfaces, hard edges, low seating, and stepping over barriers all converge, which is why so many falls happen there — and why thoughtful design pays off every single day. The encouraging part: an aging-in-place remodel does not have to look clinical. Modern accessible fixtures are genuinely attractive, and most of the key features (curbless showers, comfort-height toilets, blocking for grab bars) add resale appeal rather than hurting it. This checklist walks through the remodel zone by zone, from planning and budgeting to the finishing touches, so nothing important gets missed while the walls are open.
Plan First: Assessment, Budget and the Right Help
Before choosing tile, get clear on needs — current and future. An occupational therapist home assessment is the gold standard: they evaluate how you actually move, transfer, and bathe, then translate that into specific measurements. When hiring, look for contractors holding the Certified Aging-in-Place Specialist (CAPS) designation, who understand accessibility details ordinary remodelers miss, such as proper blocking heights and clearances.
Decide early whether you are doing a full gut remodel or a phased upgrade. A full remodel lets you fix everything at once — especially the things that require open walls, like grab bar blocking and shower valves. A phased approach spreads cost: safety-critical items first (shower access, grab bars, toilet height), comfort items later. Whichever route you take, write the plan against a checklist like the broader complete aging-in-place home modification checklist and our focused senior bathroom safety checklist so trade-offs are deliberate rather than accidental.
The Shower and Tub Zone
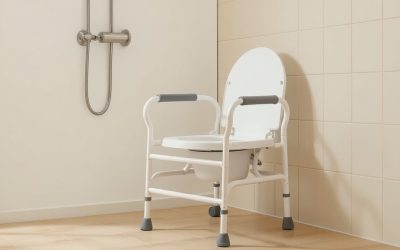
This is the heart of the remodel. The safest configuration for aging in place is a curbless (zero-threshold) walk-in shower — no edge to step over, wheelchair-rollable if ever needed, with the floor gently sloped to a linear drain. If you currently have a tub you rarely use, converting the tub to a walk-in shower is usually the best move; if soaking matters to you — for arthritis relief, for instance — a walk-in tub is the alternative worth studying carefully.
Inside the shower, specify: a fold-down or built-in bench seat at transfer height; a handheld shower head on an adjustable slide bar reachable from the seat; anti-scald (thermostatic) valve set to a safe maximum temperature; slip-resistant floor tile (small tiles with many grout lines, or textured porcelain); and a shampoo niche at seated reach height. If a full conversion must wait, a tub transfer bench and a quality bath seat are effective interim safety measures.
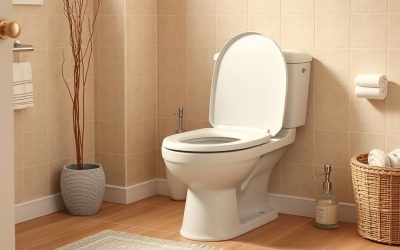
The Toilet Zone
Swap a standard toilet for a comfort-height model — roughly 17 to 19 inches at the seat, a few inches taller than standard — which dramatically eases sitting down and standing up for stiff knees and hips; our guide to the best comfort height toilets for seniors compares options. Plan grab bars on at least one side of the toilet (both sides, or a fold-down rail, where space allows), and leave clear space beside the toilet for a future caregiver or mobility device if the room permits. A bidet seat is a popular addition that supports independence with hygiene. See our roundup of toilet grab bars for the main styles and mounting approaches.
Flooring, Lighting and Doors
Three unglamorous choices quietly determine how safe the room is. Flooring: choose slip-resistant surfaces — textured luxury vinyl, matte porcelain, or small-format tile — and avoid glossy finishes entirely; remove throw rugs or replace them with low-profile rubber-backed mats. Lighting: bright, even, shadow-free light around the mirror and shower, plus night lighting for the route from bed to bathroom — motion-activated fixtures like a sensor night light mean no fumbling for switches at 2 a.m. Door: widen the doorway to at least 32 inches of clear width if walls are open anyway; have the door swing outward (or use a pocket/barn door) so a person who falls against it cannot trap rescuers out; and replace knobs with lever handles.
Vanity, Storage and Finishing Touches
Choose a vanity with the counter around 32 to 34 inches if seated use is possible later, or a wall-hung sink with open knee space. Single-lever or touch faucets beat twin knobs for arthritic hands. Mount the mirror low enough to use seated, put everyday items between roughly 15 and 48 inches from the floor, and add a phone-reachable shelf or waterproof call button — being able to summon help from the floor is a detail people only think about after they need it. Round corners on counters, towel bars rated to take body weight (or proper grab bars styled as towel bars), and adequate ventilation complete the room.
The Checklist at a Glance
| Zone | Must-Have Items |
|---|---|
| Shower/Tub | Curbless entry or walk-in tub; bench; handheld shower; anti-scald valve; slip-resistant floor; grab bars |
| Toilet | Comfort-height toilet; grab bar(s); clear adjacent space; optional bidet seat |
| Floors | Slip-resistant surface; no throw rugs; level transitions |
| Lighting | Bright even task lighting; motion night light; reachable switches |
| Door | 32-inch clear width; outswing/pocket door; lever handle |
| Vanity | Lever faucet; seated-use height or knee space; low mirror |
| Walls | Plywood blocking everywhere grab bars may ever go |
That last line deserves emphasis: while walls are open, install solid blocking along the shower, tub, and toilet walls even if you are not mounting every grab bar today. Blocking costs little during a remodel and makes every future bar a ten-minute job — our grab bar installation guide covers heights and placement in detail.
Frequently Asked Questions
What is the most important single change in an aging-in-place bathroom?
Safe shower entry. Eliminating the step over a tub wall or shower curb removes the riskiest movement in the house. If budget forces a choice, a curbless or low-threshold shower with grab bars and a bench comes first; everything else can be phased in.
Does an accessible bathroom hurt resale value?
Generally no — done well, it helps. Curbless showers, comfort-height toilets, and good lighting read as modern and high-end to most buyers, and the aging of the population keeps increasing demand for accessible homes. The features that once looked institutional now come in designer finishes.
Can I do an aging-in-place remodel in phases?
Yes, and many families do. Phase one: grab bars, comfort-height toilet, slip-resistant mats, and lighting — quick, low-cost wins. Phase two: shower conversion and flooring. Phase three: vanity, door widening, and finishes. Just install wall blocking whenever walls are open, regardless of phase.
Will Medicare or insurance pay for any of this?
Original Medicare generally does not cover home modifications like remodels, though some Medicare Advantage plans offer limited safety-item benefits, and Medicaid home and community-based services waivers in many states can fund modifications for those who qualify. Veterans may qualify for VA home modification grants. Check your specific plan and your local Area Agency on Aging before assuming you must pay entirely out of pocket.
How long does a bathroom remodel take?
A straightforward tub-to-shower conversion often takes a few days to two weeks; a full gut remodel commonly runs several weeks once work begins, plus lead time for design, permits, and materials. Plan bathing arrangements during the work — especially important if it is the home’s only full bathroom.
Related Reviews & Guides


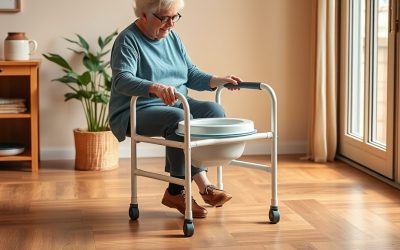
Best Portable Commode Chair for Elderly: Convenient & Dignified
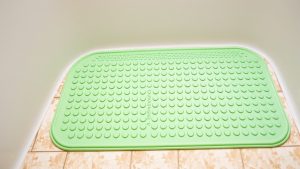
Best Bath Mats with Rubber Backing for Senior Safety