Last Updated: June 21, 2026
Top Making Home Wheelchair Accessible Room Picks for 2026
Here are our current top making home wheelchair accessible room picks, compared on real Amazon owner reviews, price, and features. Live prices update below.
Creating a wheelchair accessible home is one of the most meaningful projects a family can take on, whether you are adapting to a new mobility situation or planning ahead for aging in place. The good news is that you do not need to rebuild your house from the ground up. Most homes can be made dramatically more wheelchair friendly through a series of focused, room-by-room changes — some as simple as a threshold ramp, others as involved as a bathroom remodel. This guide walks through each area of the home, explains what matters most, and helps you prioritize so your budget goes where it makes the biggest difference. Before major structural work, it is wise to consult an occupational therapist or a Certified Aging-in-Place Specialist (CAPS), who can evaluate your specific chair, turning radius, and daily routines.
Start at the Entrance: Ramps, Doors and Thresholds
Access begins before the front door. If your entry has steps, a ramp is the first priority. The widely used accessibility guideline is a slope of 1:12 — one foot of ramp length for every inch of rise — with handrails on both sides and a level landing at the top. For one or two small steps, a modular aluminum ramp may be enough; for taller porches, a permanent wood or concrete ramp built to code is safer and more durable.
Doorways are the next bottleneck. A clear opening of about 32 inches is the common accessibility standard, and 36 inches is more comfortable for self-propelled chairs. If a doorway is slightly too narrow, offset (swing-clear) hinges can add roughly two inches of clearance without reframing the wall. Replace round door knobs with lever handles, which can be operated with a closed fist or forearm. Finally, address raised thresholds: even a half-inch lip can stop small front casters. A set of threshold ramps for doorways is an inexpensive fix that smooths transitions throughout the house.
Hallways, Flooring and Turning Space
Once inside, a wheelchair needs room to move and turn. Hallways of at least 36 inches wide work for straight travel, while turning into rooms is easier with 42 inches or more. A full 180-degree turn generally requires a clear circle about 60 inches across, so look for at least one spot in each main room where furniture can be arranged to leave that space open.
Flooring matters more than many people expect. Low-pile carpet (half an inch or less), luxury vinyl plank, laminate, and hardwood all roll well. Thick carpet, loose rugs, and uneven tile create drag and tipping hazards — remove throw rugs entirely or secure them with proper tape. Where floor heights change between rooms, use beveled transition strips rather than abrupt edges.
The Kitchen: Reachable, Rollable, Usable
A fully accessible kitchen remodel can be costly, so focus on the changes with the highest daily payoff. Aim for at least one work surface around 28 to 34 inches high with open knee space underneath, so meal prep can happen while seated. Pull-out shelves and drawers in lower cabinets bring contents to you, and D-shaped cabinet pulls are far easier than knobs for limited grip strength.
Appliance choices help too: a side-by-side refrigerator puts both fresh and frozen food at seated height, a wall oven mounted low avoids deep bending, and front-control cooktops eliminate reaching over hot burners. A single-lever faucet — or a touch-activated model — is much easier than twin knobs. Keep everyday dishes, utensils, and pantry staples between roughly 15 and 48 inches from the floor, the comfortable seated reach zone.
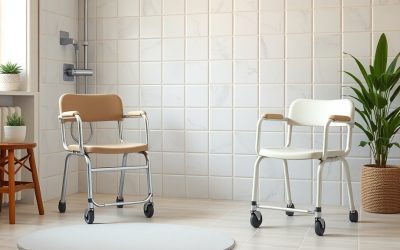
The Bathroom: The Highest-Stakes Room
Bathrooms combine water, hard surfaces, and tight spaces, which makes them both the most dangerous room and the most important to modify. A curbless roll-in shower is the gold standard; many families accomplish this by converting a tub to a walk-in shower with a fold-down bench and a handheld shower head on a slide bar. If a full conversion is not in the budget yet, a tub transfer bench provides a safe interim solution.
Install grab bars at the toilet, inside the shower, and at the shower entrance — always anchored into studs or with rated wall anchors. Our grab bar installation guide covers placement heights and hardware. A comfort height toilet (about 17 to 19 inches at the seat) makes transfers from a wheelchair far easier, and a wall-mounted or open-front vanity creates roll-under sink access. For a complete punch list, see the senior bathroom safety checklist.
Bedroom and Living Areas
In the bedroom, the key measurements are bed height and clear floor space. The mattress top should sit close to the wheelchair seat height — typically 19 to 21 inches — so transfers are level rather than uphill. Leave at least 36 inches of clearance on the transfer side of the bed. Lower the closet rod to about 48 inches or install a pull-down rod, and swap small nightstand lamps for touch lamps or smart bulbs controlled by voice. Many families also add smart home devices for lights, locks, and thermostats, which remove dozens of small daily obstacles.
In living areas, arrange furniture to create wide, predictable travel lanes and keep cords completely out of pathways. Raise low sofas with risers, or consider a supportive armchair at transfer-friendly height. Light switches around 48 inches and outlets at least 15 inches from the floor keep controls within seated reach.
Quick Reference: Key Accessibility Measurements
| Feature | Common Accessibility Guideline | Notes |
|---|---|---|
| Ramp slope | 1:12 (1 inch rise per 12 inches of run) | Handrails on both sides |
| Doorway clear width | 32 inches minimum | 36 inches is more comfortable |
| Hallway width | 36 inches minimum | 42+ inches for easy turns |
| Turning circle | About 60 inches | Needed for 180-degree turns |
| Counter height (seated use) | 28–34 inches | With open knee space below |
| Toilet seat height | 17–19 inches | Comfort/chair height models |
| Seated reach zone | Roughly 15–48 inches | Place daily items here |
These figures reflect common accessibility standards, but your ideal numbers depend on the specific wheelchair. A lightweight transport wheelchair needs less room than a powered model, so measure your own chair before finalizing plans. The broader aging-in-place home modification checklist is a helpful companion as you plan beyond wheelchair access alone.
Frequently Asked Questions
What should I modify first if my budget is limited?
Start with safe entry and a usable bathroom. A ramp or threshold ramps, one widened or hinge-adjusted doorway, grab bars, and a shower the user can actually enter safely deliver the most independence per dollar. Cosmetic upgrades can wait; safe entry and bathing cannot.
How wide does a doorway need to be for a wheelchair?
A clear opening of 32 inches is the standard accessibility minimum, measured with the door open. Many standard interior doors are narrower, but offset hinges can often add about two inches of usable width before you need to reframe the opening.
Do I need a permit for accessibility modifications?
Small changes like grab bars, threshold ramps, and hinge swaps typically require no permit. Structural work — permanent ramps, widened doorways, and bathroom plumbing changes — usually does. Check with your local building department, and use licensed contractors for electrical and plumbing work.
Will any programs help pay for these changes?
Possibly. Depending on your situation, Medicaid home and community-based services waivers, VA grants for qualifying veterans, and local Area Agency on Aging programs may help fund modifications. Eligibility rules vary by state, so contact your Area Agency on Aging as a starting point.
Is it better to modify our home or move?
It depends on the house. Single-level homes with an open layout adapt well; multi-story homes with narrow halls may cost more to retrofit than relocating to an accessible single-level home. An occupational therapist home assessment can give you an objective read before you commit either way.
Related Reviews & Guides


How to Start a Walking Program for Seniors

Best Bathing Suits for Older Women: Comfort, Support and Coverage